
Building your own diy electric mountain board kit can be an exhilarating project that combines creativity, engineering, and outdoor adventure. Whether you are a seasoned rider or a curious beginner, this guide will help you understand the essential components and steps involved in creating your own electric mountain board.
Understanding the Components of a DIY Electric Mountain Board Kit
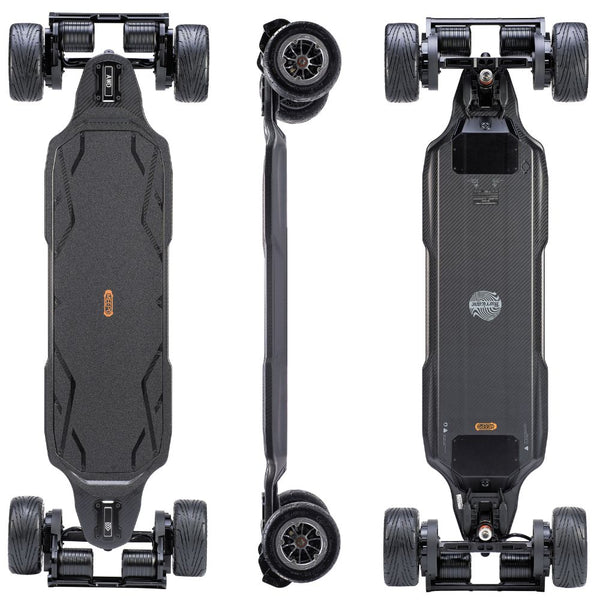
Before diving into the assembly process, it is crucial to familiarize yourself with the key components of a diy electric mountain board kit. Here are the primary elements you will need:
- Deck: The foundation of your board, typically made from durable materials like bamboo or maple.
- Wheels: Choose larger wheels for better traction and stability on rough terrain.
- Motor: A powerful brushless motor is essential for providing the necessary speed and torque.
- Battery: Lithium-ion batteries are popular for their lightweight and high energy density.
- Electronic Speed Controller (ESC): This component regulates the power from the battery to the motor.
- Remote Control: A wireless remote allows you to control the speed and braking of your board.
Step-by-Step Assembly of Your DIY Electric Mountain Board Kit
Now that you understand the components, let’s explore the assembly process. Follow these steps to create your own diy electric mountain board kit:
- Prepare the Deck: Start by ensuring your deck is clean and free of any debris.
- Install the Trucks: Attach the trucks to the underside of the deck, ensuring they are securely fastened.
- Attach the Wheels: Once the trucks are in place, mount the wheels. Make sure they spin freely.
- Mount the Motor: Secure the motor to the rear truck, ensuring it is aligned properly for optimal performance.
- Connect the ESC: Wire the ESC to the motor and battery, following the manufacturer’s instructions for proper connections.
- Install the Battery: Secure the battery to the deck, ensuring it is well-protected and won’t shift during use.
- Test the Remote Control: Pair the remote with the ESC and test the functionality before taking your board for a ride.
Safety Tips for Riding Your DIY Electric Mountain Board
While building your diy electric mountain board kit is exciting, safety should always be a priority. Here are some essential tips:
- Always wear a helmet and protective gear.
- Test your board in a safe, open area before venturing onto more challenging terrain.
- Be aware of your surroundings and ride at a safe speed.
Where to Find Quality Components for Your DIY Electric Mountain Board Kit
Finding quality components is vital for the performance and durability of your diy electric mountain board kit. A reputable source for electric mountain board parts is ![]() . They offer a range of products that can help you build a reliable and high-performing board.
. They offer a range of products that can help you build a reliable and high-performing board.
In conclusion, creating your own diy electric mountain board kit can be a rewarding experience that enhances your riding adventures. By understanding the components, following the assembly steps, and prioritizing safety, you can enjoy the thrill of electric mountain boarding like never before.